Shoot for the Stars: Beginners Guide to Landscape Astrophotography
Night landscape photography is a magical way to record the captivating dance between the stillness and motion of the earth and the stars. As the darkness descends, the hidden treasures of the night sky are unveiled and our camera lens captures the stars' sparkling radiance. Like tiny diamonds in the sky, they paint a celestial canvas that blends seamlessly with the earthly darkness of the landscape below. It is a moment frozen in time as in every other genre of photography, a dreamlike essence that captures the reality of our planet drifting through the vastness of the universe.

Planning
In today's busy world, finding time to pursue our love for photography often feel like a challenge. However, when it comes to landscape astrophotography, careful planning becomes an indispensable tool for maximizing our time and capturing truly extraordinary images. From scouting locations to considering celestial events, each step in the planning process contributes to the creation of our artistic vision. While spontaneity has its merits, acknowledging the importance of planning in landscape astrophotography allows us to seize every opportunity and ensure that our time is well spent, bringing us closer to our goals and aspirations in this captivating hobby.

Anyway, as landscape astrophotographers, we must strive for quality in both the sky and the landscape. To capture the best possible night sky we need to be prepared. The process I follow is customized to my needs and capabilities, and it is not necessarily the correct or only way, but it may partially enlighten a beginner on how to proceed.
Familiarize yourself with the night sky: Knowing the position of the celestial object you plan to shoot is essential to avoid wasting time and missing out on the opportunity to capture it. Study major constellations to be able to find your way around the sky, especially in semi-polluted areas where only the brightest stars are visible. Be prepared, the overwhelming beauty of a dark, star-filled sky is dazzling. Additionally, learning about the structure of the celestial objects you want to photograph, as well as the myths and legends associated with them, can greatly increase your interest and appreciation for astrophotography. Last and foremost, study and understand the movement of the night sky, this will determine when and what kind of shot you can strive for.
Choose your location: Look for a location with minimal light pollution, which will help you capture better images of the night sky. You can use apps such as Dark Sky Finder or Light Pollution Map to find dark sky locations near you.
The first thing I do when choosing a place to photograph that I haven't visited before is to open Google Earth and study the terrain to get a first impression of the place. Then I carefully examine photos taken in the area for a better representation, as well as interesting points and inspiration. Stellarium or Skysafari are astronomical programs that can depict the position of celestial objects by changing the date, allowing us to see what the sky will look like at another time shortly. If the season doesn't work, I note the location to visit later in the year and search for something else. The next step is to look at the accessibility of the point of interest and research any possible trails that may exist in the area. Great applications that have proven useful for offline maps, trail recording, etc. are Alltrails.Check the weather forecast: Clear and dry skies are ideal for capturing sharp and detailed images. Weather conditions can change quickly in mountainous microclimates, making it important to check conditions before stargazing. Although the forecast may be generally good, it's possible that the location we plan to visit could be cloudy or have high humidity. To get accurate information, I recommend using the Clear Outside app for Android/ios. This app provides useful data about specific locations and is usually reliable. As I pointed out at the beginning weather can give impressive results, so if the app indicates that there are high clouds don't be disappointed, these could create useful effects in landscape astrophotography by diffusing the stars.
Choose the right clothing: Nights at high altitudes can be very cold, even in summer. To ensure we stay warm and dry, we wear appropriate clothing that can be easily adapted to weather changes. Our attire must be layered so that we can add or remove clothes according to the activity and the temperature. We avoid cotton clothing and prefer synthetic clothes designed for mountaineering. We always carry thermal wear, fleece, and windproof and waterproof jackets to keep us warm and dry. Tight athletic thermals work well when we're active, but for stationary activities in freezing temperatures, we prefer loosely fitting thermal underwear like long johns. Good mountaineering pants provide great ease of movement and durability, so investing in them is appropriate. In winter, we also wear gloves, hats, neck warmers, warm socks, and gaiters.
Always carry with you: food, water, a small first aid kit, maps/GPS, headlamp or handheld flashlight preferably waterproof, spare batteries/power bank, sunglasses, sunscreen, and insect repellent.
Scouting: Whichever location we choose, we will do ourselves a favor if we visit it during the day. Scouting the area will allow us to study the place we will photograph, avoiding dangers that will be almost impossible to detect at night. Also is a great opportunity to find a spot for camping or a place that can protect you in case the weather turns bad. Additionally, visiting during the day may enlighten us about interesting ground elements that we can incorporate into our frame, such as flowers, tree trunks, and unique rock structures, to create an interesting foreground. Using apps like Photo Pills Night AR allows us to visualize the position of the stars, Milky Way, moon, and other celestial objects in the night sky at any given time and location, by pointing your smartphone camera towards the sky, and the app overlays the virtual representation of the night sky onto the live camera view, helping us choose the ideal composition.
Safety: Always let someone know about your location and estimated return time if shooting alone.
-Essential Gear-

Cameras
When it comes to landscape astrophotography, it's crucial to have a camera that can handle long exposures and high ISO settings while maintaining high image quality. Full-frame cameras are often the preferred choice due to their larger sensors, which capture more detail and light. However, modern cameras released after 2014 can still produce stunning images of the night sky. Some useful features to look for include:
With an iso-invariant sensor, there is practically no penalty when shooting low iso and then brightening the exposure in post. To be precise there are no perfect iso-invariant cameras rather some are optimized for only a part of their ISO range to work that way.
Dual ISO is a feature like iso-invariance found in some cameras that offers two base ISO settings, allowing for cleaner images with more detail in low-light conditions. Instead of simply increasing the ISO and losing dynamic range, dual ISO cameras have two amplifiers that the signal can travel through, reducing the amount of signal noise that is produced.
Full Well Capacity is the capacity of the photosite (pixel) to hold light before it becomes saturated. Some cameras have a larger full well capacity that can allow for better dynamic range and more accurate representation of high-contrast scenes. Cameras with small well depth often bloat stars.
A built-in intervalometer is a handy feature that works the same way as an external intervalometer and helps us create a timelapse.
Bright Monitoring or Starlight is a setting that boosts the image brightness temporarily, allowing the user to get a better view of the scene and compose it easier.
A built-in tracker that helps extend exposures without star trailing therefore more detail to be captured in the night sky.
While those cameras might have an edge with integrated features specifically designed for astrophotography, every camera on the market can produce decent landscape astrophotography images including yours, so just go out and shoot.
Lenses
Lenses are just as important as cameras if more. A good lens can make a significant difference in the quality and sharpness of your images. Lenses with wide maximum apertures (low f-numbers) are important because they allow for more light to enter the camera, enabling faster shutter speeds and lower ISO settings. In landscape astrophotography, wide-angle lenses are commonly used for capturing expansive views, but normal or small telephoto lenses can also be useful for creating panoramic shots that tend to capture more detail. The most common lens aberrations that can have an impact on astrophotography are:
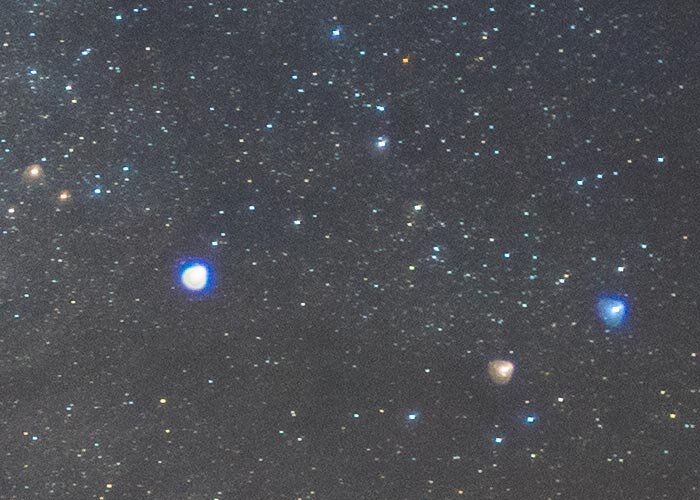
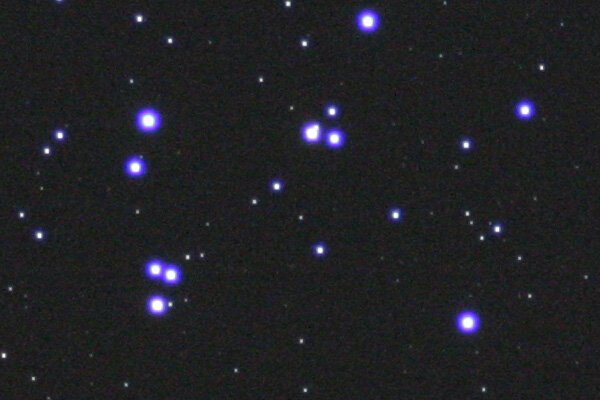
Chromatic aberration is the inability of optical elements to focus all colors at the same point. The most common form of it is axial chromatic aberration. In astrophotography, we often encounter the term "purple fringing," which describes the distortion of the purple color around stars. Lenses that have problems with the blue color also exhibit this phenomenon frequently.
Coma is another problem of lenses that results in the distortion of stars, usually in a comet-like shape. Lenses that perform well during daytime photography may give poor results under the harsh lighting conditions of the night sky. The direction of the distortion's tail on the stars can reveal whether it is an internal or external coma. Often, the problem can be mitigated by stopping down the lens aperture, but at the cost of reduced light-gathering ability.
Astigmatism is the most common aberration in lenses, even more than coma, which causes the point light of stars to appear as lines, especially at the edges of our field of view. Astigmatism is a distortion that is very difficult to correct. Closing the aperture does not solve the problem.
Vignetting refers to the darkening or reduction in brightness at the corners or edges of a photograph compared to the center. It creates a gradual darkening effect that draws attention toward the center of the image.

You can check your lens behavior by making a simple star test or by shooting distant city lights. In every case, few, expensive lenses are fully corrected for the aberrations mentioned. If your lens suffers from:
Coma: to overcome this problem there are three solutions. First, you can stop the lens down but you will lose light-gathering capability. Second, you can try to fix the stars in post-processing but the results are mixed and third and best option in my opinion is by shooting a series of overlapping images the same way you would shoot a panorama. Most lenses have reasonable coma control in the center of the frame so if you shoot let’s say a 24mm lens you will need just three shots to create good stars across the field. Far more effective than time-consuming post-processing.
Chromatic aberration: If your lens suffers from this problem the best solution is to check in the Lens Correction tab in Ps the Remove chromatic aberration box or adjust it manually.
Astigmatism: same as coma, shoot a series of overlapping images the same way you would shoot a panorama.
Vignetting: the best way to correct this is by taking flats or post processing.
Lenses and their Use in Landscape Astrophotography
Wide-Angle Lenses: Wide-angle lenses have a shorter focal length, typically ranging from around 10mm to 28mm. They capture a wide field of view, making them suitable for capturing expansive star fields, the Milky Way, meteor showers, or auroras. These are the most friendly lenses for beginners.
Normal Lenses: In astrophotography, normal lenses with focal lengths between 35mm-85mm are used for creating panoramas or framing constellations. They are often more difficult to achieve good focus than a wide-angle lens, but the results they produce are truly stunning.
Telephoto Lenses: Telephoto lenses have longer focal lengths, typically ranging from around 135mm to 600mm. They provide higher magnification, allowing for detailed close-ups of celestial objects such as the Moon, and nebulae, and can be used creatively with rising or setting celestial bodies. Telephoto lenses such as Samyang 135mm can even be used to create stunning panoramas, showcasing superb levels of detail. With these lenses, we are in the wide field astrophotography domain and they usually serve as a stepping stone for telescopes.
Tripod
Nothing is more important than a good, sturdy tripod. Even if we have the best tracker and the most expensive lens, an unsuitable tripod will result in blurry photos at the slightest breeze. The tripod should be capable of easily lifting the weight we load onto it, but also lightweight enough for us to carry, as it's difficult to have separate tripods for astrophotography and other photographic needs. A high-quality, lightweight tripod with a large weight capacity will provide a solid foundation for building our equipment and allow us to venture into larger focal lengths and extended hikes. If I was starting today, I would spend most of my money here.
Ballhead
Any ball head that can easily support your equipment can be successfully used. The only thing to be careful of is choosing a ball head that facilitates panorama creation.
Star Trackers(non essential)
Do you find yourself lacking a fast lens in your photography gear? Are you disappointed with the unsightly high ISO noise in your camera's images? Buy yourself a star tracker. Star trackers are essentially platforms equipped with a motor capable of synchronizing with the motion of the Earth to counteract the apparent motion of the sky allowing photographers to capture with lower iso, long exposure images of the night sky without any motion blur, resulting in crisp and detailed photographs of the stars and other celestial bodies.
-Shooting the Photos in the FIeld-
Tips, tricks, and techniques for capturing nightscapes

Image taken at National Amateur Astronomers Gathering 2018
Camera Settings
The following settings may vary based on the type of astrophotography you are doing but for the most part hold true for any kind of astrophotography.
Switch your camera to manual mode to have complete control over your settings.
Switch Lens Mode to Manual and focus *
Select Raw
Disable LENR (Long Exposure Noise Reduction) Optional for beginners.
Disable Lens Correction Profile if your camera supports it. Most of the time creates problems than solving them.
Use the widest aperture your lens allows to let in more light. A good starting point is f/2.8 or wider.
Set your White Balance to Daylight
Shutter speed*: Use a long exposure time to capture as much light as possible. Start with a shutter speed of 15-30 seconds, but adjust as needed based on the brightness of the Milky Way and the amount of ambient light.
Select a 2 or 10sec delay to avoid camera shake or plug in your intervalometer.
How to Focus
There are 6 different methods to focus at night depending on your camera capabilities, gear, and technique we use.
Daytime focusing (not advised): Focus on a distant object on the horizon and then put some gaff tape on the lens to prevent it from moving.
Use Autofocus: Many modern mirrorless cameras can autofocus on bright stars with a very bright lens.
Use Live View: Enable Live View mode on your camera to see a magnified view of a bright star, zoom in, and adjust until the star is as small as possible. It would help to enable Focus Peaking mode if available and check nearby stars if they have your selected focus peaking color.
Bahtinov mask: A Bahtinov mask is the most accurate way to focus the stars. It consists of a thin, opaque material with a series of notches or slots cut into it in a specific pattern. When placed over the front of a telescope or camera lens, the mask causes diffraction spikes to form around bright stars. By adjusting the focus until the central spike intersects the other two spikes at a precise point, the user can achieve optimal focus.
Focus Stacking: This technique is used to create an image with a larger depth of field than what would be possible with a single shot especially when the scene has interesting foreground elements. It involves taking multiple images of the same scene, each with a different focus point, and then blending them into a single image using software. Typically in landscape astrophotography, one shot is taken to capture the stars, and another shot is taken to capture the foreground. An easy way to focus in the foreground when there is no artificial or moonlight is to illuminate the scene with a torch and focus.
Hyperfocal distance: Hyperfocal distance is a term used in photography to refer to the closest distance at which a lens can be focused while still keeping all objects in the scene in sharp focus from infinity to the foreground. To calculate the hyperfocal distance, you can use a hyperfocal distance chart or an online hyperfocal distance calculator. These tools typically require you to input the focal length of your lens, the aperture setting, and the camera sensor size to determine the hyperfocal distance and then apply it in the field. Practice in daylight finding the hyperfocal distance of your lens to be able to use this technique in the dark.

Out of the mentioned techniques, I personally prefer using live-view, focus stacking, and occasionally Bahtinov mask for telephoto lenses as they have consistently produced good results. However, it's important to keep in mind these simple guidelines:
Avoid relying solely on the infinity mark on your lens for achieving accurate focus.
Take multiple test shots and zoom in to ensure your focus is sharp no matter the technique applied.
Periodically check your focus throughout the night, particularly if the temperature has dropped, to ensure optimal results.
How to Compose in the Dark
You watch the last remnants of the blue light fade away on the horizon, the crisp air fills your lungs as the night descends with a veil of stars. You are ready to take your first image. You look through the camera and you see nothing but shadows and some star. How will you frame your subject?
Crank up your ISO. Remember those ridiculous extended ISOs in your camera? I choose 409.600 on my a7s and dial 1sec exposure with the lowest f-number on my lens. Take a series of shots, continuously refining your composition until you achieve the perfect image.
Turn on Bright Monitoring or Starlight. It will boost the live view image brightness temporarily to allow you better framing.
When there is an interesting foreground close to the camera, light the scene with your flashlight.
Shutter Speed
As the Earth rotates on its axis, the stars and other objects in the night sky appear to move across the field of view of the camera. This can cause blurring or distortion in the final image known as star trailing. In order to shoot sharp stars we need to choose a shutter speed that is long enough to capture enough light from the stars but short enough to prevent star trails. Most will advise you to use the 500 or the 400 rule which in my opinion is not good enough but you can use them as a compass.
The 500 rule is a simple formula used in astrophotography to determine the maximum exposure time for capturing sharp images of the stars without trailing. It states that the maximum exposure time (in seconds) should be approximately equal to 500 divided by the effective focal length of the lens (in millimeters). For example, if you are using a 24mm lens, the maximum exposure time should be around 20 seconds (500/24=20,8333). This rule takes into account only the focal length of the lens, but the amount of field rotation depends also on various factors:
Declination of the object: Objects closer to the celestial equator will actually exhibit more field rotation compared to objects near the poles, due to the faster rotation of the Earth at the equator.
The pixel size of the camera sensor also affects the appearance of field rotation, with smaller pixel sizes resulting in more pronounced trails.
Focus: If your focus is not perfect then bloated stars won’t show the same amount of trailing as pinpoint stars will.
ISO
ISO in digital photography can be understood as an amplification factor applied to the signal captured by the camera's sensor. When we increase the ISO setting on a digital camera, we effectively amplify the electrical signal generated by the sensor in response to the light hitting it. This amplification boosts the brightness of the image, making it appear brighter in the final photograph.
Contrary to common belief, higher ISO settings do not necessarily mean noisier images. The ISO setting amplifies both the signal and any noise present in the image. If the captured light is insufficient, the ISO will amplify the noise too. It's important to understand that this noise is mainly influenced by the exposure and not solely by the ISO setting.
The trade-off when adjusting ISO is not primarily about noise but rather about dynamic range. Dynamic range refers to the range of tones that can be captured, from the brightest to the darkest areas of an image. Higher ISO settings can decrease the overall dynamic range, potentially resulting in a loss of detail in the shadows.
Aperture
In addition to ISO, aperture plays a crucial role in astrophotography. The aperture controls the amount of light that reaches the camera sensor by adjusting the size of the lens opening. Opting for a lower f-number (wider aperture) allows more light to reach the sensor, resulting in a stronger signal and cleaner images. Conversely, less light entering the camera leads to noisier images.
A Game of Compromise
To capture cleaner astrophotographs, it is recommended to choose a lower f-number (wider aperture) to maximize the amount of light hitting the sensor while using the lowest ISO setting that still achieves proper exposure. This helps maximize the signal-to-noise ratio and retain more detail in the final image. A typical, safe ISO to choose would be 1600 or 5 stops above base iso but that defers a lot in today’s digital landscape as cameras with double-base ISO or iso-invariance sensors tend to have their own preferred sweet spot ISO settings. Always remember aperture is how much light we gather, and the shutter speed is for how long. Those two will mostly determine what ISO we gonna choose to balance the exposure. The focal length we use will limit our shutter speed. It is a game of compromise.
A forgotten friend: Histogram
As a rule of thumb avoid judging the exposure from the playback of the camera’s EVF or Lcd screen. It is recommended to enter your camera’s menu and dial down the brightness of the LCD screen. Histogram is still your best friend. Understanding and analyzing the histogram can provide valuable information about the exposure and overall quality of your image. When capturing astrophotographs, having a well-exposed image is crucial. A properly exposed image will have a histogram that is spread out across a wide range of brightness values, ensuring that both the shadows and highlights contain useful information. Ideally, you want to avoid an image with a histogram that is heavily concentrated towards the left end, as it may indicate underexposed. One-quarter histogram exposure from the left is a typical indication of good enough exposure at night.
-Techniques for Nightscapes-

Speed of Light taken in Mount Parnon
Stacking
Stacking is a powerful technique of capturing and processing multiple images of the same scene that improves the overall quality of the final image. One of the key benefits of stacking is noise reduction. As the software merges the images, it averages out the random noise present in each individual frame, resulting in a smoother and cleaner final image. The stacking process helps to improve the signal-to-noise ratio, revealing more details and reducing unwanted noise artifacts. It's important to keep the camera settings consistent across all the images, including exposure time, ISO, aperture, and focus.
HOW MANY SUBS TO STACK?
The square root relationship (1/sqrt(N)) in astrophotography stacking describes the reduction in noise as the number of photos stacked increases. It states that for each additional photo stacked, the noise is reduced by approximately 1 divided by the square root of the number of photos. This leads to an improvement in the signal-to-noise ratio (SNR) of the final image, resulting in a cleaner and more detailed image.

For a deep sky photo things are simple. We stack as many subs as we can. For Nightscapes though, 10-20 photos are good enough. Note, the actual noise reduction can vary based on factors such as the quality of the individual photos and the specific stacking process used.
Exposure Blending
Exposure blending is a technique used in astrophotography to overcome the challenges posed by the high dynamic range of the night sky. It involves capturing at least two different exposures of the same scene and then blending them together in post-processing. The goal is to capture details in both the dimmer areas of the landscape as well as the night sky to create a final natural and visually pleasing image. In order to achieve that always remember that the foreground must be at least a stop dimmer in my opinion to look natural.
Time Blending
Time blending is a popular technique used in order to capture and combine multiple exposures taken over an extended period. It involves blending images of the landscape taken during the blue hour with images of the night sky, typically the Milky Way, taken when it is dark enough and blending them in Photoshop.
The primary objective of time blending is to create a final image that has a crisp and clear foreground while maintaining good quality in the sky. One of the challenges in this technique is that the sky exposures often contain more noise compared to the landscape exposures. If you wish to overcome this, shoot both landscape and sky with the same ISO and aim to stack multiple sky exposures to reduce noise and make it visually consistent with the landscape. I am not a fan of this technique mostly because a lot of photos seem unnatural.
Focus Stacking
Focus stacking is a technique used in photography to increase the depth of field in an image. It involves taking multiple photos of the same subject, each with a slightly different focal point, and then combining them into a single image using software like photoshop. Focus stacking can be combined with other techniques like exposure or time blending.
Panorama Stitching
Panorama stitching is a technique used to capture a wider field of view of the night sky and the landscape. It involves capturing multiple overlapping images of the sky and land and then combining them in post-processing to create a single wide-angle image. It is a quite challenging technique especially when using lenses with longer focal lengths, tracking and stacking. Under those circumstances, planning for the shot must be precise in order to achieve a good stitch. Also, post processing requires dedicated software to be able to create a smooth stitch. Panoramas maybe are difficult but it is one of the most rewarding techniques used in astrophotography. Nothing beats a crisp, full of detail Milky Way Arc.
Star tracking
Star trackers compensate for Earth's rotation, capturing sharp, detailed night sky photos without star trails. Precise polar alignment is crucial for successful star tracking, aligning the mount with the celestial pole. In this technique, two images are taken: one for the sky and one for the landscape. These images are then combined in software like Photoshop for a seamless result. Star tracking revolutionized landscape astrophotography as it allows perfect exposures for the celestial bodies resulting in high-quality images.
Nightscapes
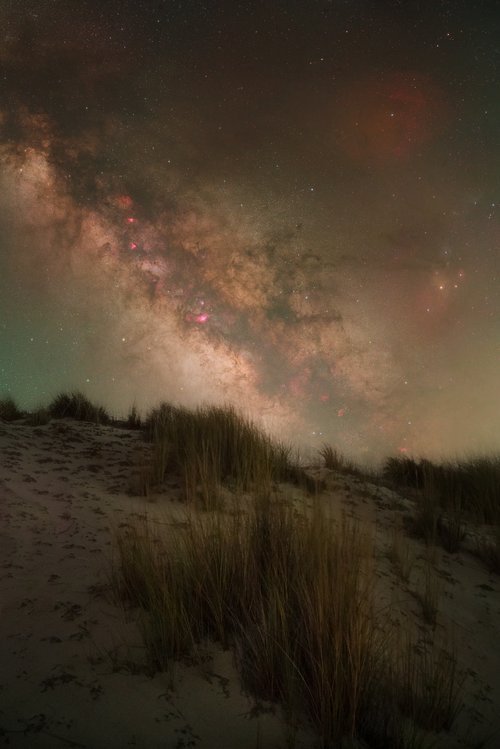
Milky Way
“Over the Hill” taken in Elafonisos Island using multiple techniques and post processing.
Milky Way photography has undoubtedly become the most popular genre of landscape astrophotography in recent times, captivating photographers and causing us to willingly sacrifice sleep. It requires dedication, perseverance, and a willingness to learn from multiple attempts before achieving the desired results. However, the sense of fulfillment and awe it brings when capturing the magnificence of the Milky Way under the night sky makes it all worthwhile. All the techniques we have already mentioned were created for capturing the Milky Way but in summary, it is a safe bet to follow those simple rules:
Find a dark location: Light pollution can significantly impact your ability to capture a clear Milky Way.
Check moon phase and rise/set times: Moonless nights offer the best conditions for capturing the Milky Way.
Use a wide-angle lens with a large aperture.
Use a sturdy tripod
Manual mode and settings, aperture wide open (e.g., f/2.8), ISO between 1600 and 3200, and a shutter speed of around 20 to 30 seconds. Shoot only RAW.
Focus on a bright star using the live view mode.
Capture multiple exposures to reduce noise.
Moonscapes

“Magnitude” is taken under a full moon in Meteora, Greece.
Deep-sky astrophotographers consider the moon as an additional source of light pollution. Therefore, most guides for photographing the Milky Way suggest capturing photos only during the new moon phase. However, for landscape astrophotographers, it would be a mistake not to take advantage of the transformative power of the moon in the landscape. The moon can be captured in different phases, ranging from a slender crescent to a full moon, each offering its own visual appeal.
You can plan your shoots to align the moon with specific landscape features, such as mountains, seas, lakes, or architectural elements.
The moonlight of a setting or rising moon can also illuminate the landscape, casting unique shadows and adding a soft glow to the scene creating an ethereal atmosphere.
Moon and Milkyway are not always contradicting elements. Sometimes can create special images.
Camera settings for Moonscapes
Start with a low ISO (e.g., ISO 100-800) to minimize noise if available light is plenty.
Use a narrow aperture to create more depth of field.
Experiment with different shutter speeds, ranging from a few seconds to several minutes, to capture the desired level of detail
Be mindful of the exposure difference between the moon and the landscape.
Experiment with exposure bracketing to capture a range of exposures for blending in post-processing.
Startrails

“Rock and Roll” taken near Athens, Greece
Star trail photography captures the mesmerizing movement of stars in the night sky over an extended duration. It utilizes similar principles to astrophotography but with a focus on embracing the beauty of star trails. By employing long-exposure techniques, typically lasting from a few minutes up to several hours, the Earth's rotation causes the stars to create captivating streaks or trails across the image. This technique allows for the creation of unique images based on the camera's orientation, resulting in a variety of fascinating compositions. With no limitation on exposure time, selecting a lower ISO setting allows for extended shutter speeds while minimizing noise and preserving the natural colors of the stars.
Aurora

Have you seen The Green Lady? Also known as Aurora Borealis or Northern Lights, is a natural light display that occurs in the polar regions of the Earth. It is caused by the interaction between charged particles from the Sun and the Earth's magnetic field. When these particles collide with atoms and molecules in the Earth's atmosphere, they emit light of various colors, creating the most beautiful show you can watch. The best time to see the Aurora Borealis is during the winter months in the Northern Hemisphere, typically from September to March. However, it's important to note that the exact timing and visibility of the Northern Lights can vary based on several factors, including location, weather conditions, and solar activity. General rules of astrophotography are also applied here but with a bit more experimentation as the Northern light storm vary in intensity and moving speed.
Composition Tips for Nightscapes
One of the most prevalent mistakes we make as beginners in landscape astrophotography is the oversight of incorporating captivating foreground elements into our compositions. Often, there is an excessive focus on capturing the night sky while neglecting to include foreground subjects that could add depth and visual interest to the image. This usually results in an unbalanced composition where the pitch-black foreground contrasts with the bright and colorful Milky Way, which can reduce the overall impact of the photograph. To enhance the composition, it is important to carefully consider and incorporate foreground elements that harmonize with the celestial backdrop, creating a cohesive and captivating visual narrative.

Using wide-angle lenses can also be counter-productive for our composition if we don’t pay attention. Overcrowding the frame with too many elements can result in a chaotic and weak image. Without a clear subject or focal point, the composition can feel scattered. The foreground elements must complement the night sky rather than compete with or distract from it.
To guide the viewer's eye and enhance the sense of depth and dimension in your images, consider using leading lines and exploring unusual perspectives. Elements such as roads, trees, caves, and natural lines in the landscape can help you frame your composition and guide the viewer counterbalancing the lack of depth caused by using a low f-number in your lenses. Experiment with different angles and viewpoints to find unique perspectives that draw attention to the main subject.
It is obvious that the composition rules that apply to landscape photography also extend to astrophotography. The lack of light presents its own set of challenges, but it also offers a uniquely rewarding experience. Relax and enjoy the night. Take your time when you frame your shot and let your creativity lead you to the stars.
I hope you find this guide a good place to start your fascinating journey in Landscape Astrophotography! Clear skies!